Dear friends, we are glad to inform you that we launched our brand new, renovated website. One of the great features of our new site is that the Coherent Blog is integrated inside.
You can find it HERE:
Subscribe: RSS feed
Please keep in mind that the Blog will be updated only in its new location.
Thank You,
Coherent Labs team
Thursday, August 29, 2013
Tuesday, August 6, 2013
Getting started with Coherent UI for Unity3D (Video Tutorial)
We are proud to present to you our first training video for Unity3D. This tutorial covers the basics of using the Coherent UI package, from importing and installing the package to assigning UI Views to different surfaces. You'll see how to render your HTML files projected on the camera or on a 3D object inside the world of your game. You'll also learn how to use our custom coui:// protocol to display files from your local filesystem.
We'll put the cherry on the top by showing you a peek at the Coherent UI Debugger which allows live editing of your HTML. It gives you much more flexibility than you'll see in the video of course, but showing them requires a tutorial of it's own... which is coming soon
For the purposes of this video tutorial, we have used our Standard package of Coherent UI.
You can request your free trial from here, or purchase a Mobile, Basic, Standard or Pro version of Coherent UI for Unity3D from here.
Please stay tuned for more video tutorials, coming out soon :)
Wednesday, July 24, 2013
Coherent UI Mobile Beta for Unity3D now features Android support
We, at Coherent Labs are very pleased to inform you that our last couple of weeks of intensive development and testing have resulted in a new product release. Coherent UI Mobile Beta is now available with both - iOS and Android support. Those of you, who are using Basic or Standard version of Coherent UI will receive the complete mobile support as a free update.

Try our product now and take advantage of the 30% discount which is still available during the Beta period and thus buy Coherent UI Mobile for 70$ only.
Coherent UI Mobile features:
- In-game browser
- Easy exposure of game objects to the UI
- Hardware-accelerated CSS3, canvas and WebGL
- Fully functional preview on Windows and Mac OS X
- iOS and Android support.
All versions of Coherent UI for Unity3D are published on the Asset Store.
Tuesday, July 9, 2013
Coherent UI for .NET PRO is now available as a standalone product
We at Coherent Labs, have always been working towards one main goal - to meet your needs and provide a great solution, no matter if you are developer, artist or producer. Less than two weeks ago we released our Mobile Beta version for Unity3D and now we have already prepared something new for you.
We are glad to introduce you our new standalone product - Coherent UI for .NET.

Main features:
- .Net API for the native Coherent UI library
- fully cross-platform web browser control for WinForms, WPF and MonoGTK, covering Windows, Mac OS X and Linux.
- automatic binding of C# objects to the JavaScript universe.
Coherent UI for .Net browser control allows you to embed a browser inside your .Net application and still run on all desktop platforms using a single API. Coherent UI for .Net provides standards compliant HTML5 browser with SSL support.
Coherent UI for .Net also integrates seamlessly in your XNA, MonoGame, SharpDX or SlimDX game with the complete features of the native library. You can use Coherent UI for .Net to add HTML5 user interface, in-game browser and video player to your game or integrate it with the social networks.
The professional version is available for purchase on our website for $899. We also encourage you to try our Trial version, which is available for download here.
Monday, July 8, 2013
Using Coherent UI with TypeScript 0.9
Some time ago we showed how to use Coherent UI with TypeScript via the .Net method binding.Now that TypeScript 0.9 is released with new features such as generics, overloading on constants and declaration merging we can take much more advantage of its static type checking. First lets see what these features do and then see how it can be used with Coherent UI.
Overloading on constants is the most interesting of the three and is one of the unique features of TypeScript. It allows for precise type annotations on functions that return different objects based on the value of an argument. The definitive example is
This not only saves us the annoying cast in
But also catches the next typo at compile time if we are more a little bit more explicit about the type:
Declaration merging allows to split declaration of module or an interface in multiple files. Although it doesn't sound very impressive, the other features would be less convenient to use with Coherent UI API without it.
Generics have no surprises and work as most other languages. They allow for type safe declaration of containers and generic functions. We are going to use them for type safe declaration of promises:
Combined with overloading on constants, generics give us ability to declare type safe events for Coherent UI. We can describe the number of arguments and their types for each event we expect:
As you already have noticed the same combination can be used for type safe declarations for the
Given the above declarations I would hope the following code to generate a compile-time error about
Unfortunately not. As the TypeScript speficiation says in section 3.7.2.4: Specialized Signatures:
This means that if the second argument is not of a type matching the overload declaration, the declaration is simply ignored and the code is perfectly valid.
TypeScript gets better and better and is used in more projects. Most JavaScript libraries have type declarations either bundled or in projects like DefinitelyTyped, making TypeScript valuable even for smaller projects that just glue some third-party libraries.
So if want to use TypeScript for your game user interface the place to start is the type declarations for coherent.js
Overloading on constants is the most interesting of the three and is one of the unique features of TypeScript. It allows for precise type annotations on functions that return different objects based on the value of an argument. The definitive example is
document.createElement:This not only saves us the annoying cast in
But also catches the next typo at compile time if we are more a little bit more explicit about the type:
Declaration merging allows to split declaration of module or an interface in multiple files. Although it doesn't sound very impressive, the other features would be less convenient to use with Coherent UI API without it.
Generics have no surprises and work as most other languages. They allow for type safe declaration of containers and generic functions. We are going to use them for type safe declaration of promises:
Combined with overloading on constants, generics give us ability to declare type safe events for Coherent UI. We can describe the number of arguments and their types for each event we expect:
As you already have noticed the same combination can be used for type safe declarations for the
engine.call method.Given the above declarations I would hope the following code to generate a compile-time error about
Show having wrong signature:Unfortunately not. As the TypeScript speficiation says in section 3.7.2.4: Specialized Signatures:
"Because string literal types are subtypes of the String primitive type, when a function call argument matches a parameter of a string literal type in a specialized signature, the overload resolution rules (section 4.12.1) give preference to that signature over a similar signature with a regular string parameter."
This means that if the second argument is not of a type matching the overload declaration, the declaration is simply ignored and the code is perfectly valid.
TypeScript gets better and better and is used in more projects. Most JavaScript libraries have type declarations either bundled or in projects like DefinitelyTyped, making TypeScript valuable even for smaller projects that just glue some third-party libraries.
So if want to use TypeScript for your game user interface the place to start is the type declarations for coherent.js
Wednesday, June 26, 2013
Coherent UI Mobile Beta is now available on Unity Asset Store
Basic and Standard Packages of Coherent UI for Unity3D get mobile support as a free update.
Our mission in Coherent Labs is to help You - game developers and game production studios save money and time in the UI implementation process. We are working hard on meeting your needs and in the past few months have received many requests for an iOS and Android support of Coherent UI for Unity3D. Today, we are glad to announce that we are now officially supporting mobile platforms as well. The mobile support is included as a free update in the Basic and Standard packages of Coherent UI for Unity3D.
For those of you, who create games for mobile platforms only, we are also introducing our new standalone product - Coherent UI Mobile, which is now available on Unity Asset Store. Order our product now, during Beta and receive 30% discount for the price of $70 only.

Coherent UI Mobile features:
- In-game browser
- Easy exposure of game objects to the UI
- Hardware-accelerated CSS3, canvas and WebGL
- Fully functional preview on Windows and Mac OS X
- only iOS support at the moment. Android will be added soon.
All versions of Coherent UI for Unity3D are published on the Asset Store.
Tuesday, June 18, 2013
Modern Game UI with the Oculus Rift - Part 2
In this second part of the series I'd like to share some thoughts about how to create, integrate and organize UI in Virtual Reality(VR) and more specifically the Oculus Rift.
The conclusions I reached are very similar to the ones the Valve team got in their work in porting Team Fortress 2 for the device. I'll also mention some ideas I will try in the future but hadn't enough time to complete.
3D world UI elements usually will need no change when transitioning a game to VR. They already are in the game world so no special care should be taken. The overlay UI however will need significant modifications in it's rendering and probably also in the elements itself to cope with the specifics of the Rift.
If you leave the same 2D overlay for the UI in VR you'll get something like this:

This result is obviously wrong, most of the elements won't be visible at all because they fall outside the field of view of the player. The central region of every eye in the Rift is where the player sees more clearly, everything else is periphery - the same applies to your eyes in the 'real' world.
If we composite the HUD before the distortion we'll get this:
 At least now everything is in the FOV of the player but the peripheral vision of the result remains. More importantly the UI is not adjusted for stereo rendering - the left and right eyes see different things and the result will surely cause at least a headache.
TF 2 is a FPS game where you have a body that holds a weapon while you can freely rotate your head. Valve made a very clever decision when they noticed players were forgetting where their bodies are facing after looking around with their virtual heads. They always put the UI in front of the body, not the head. In this way the player always has a point of reference and can return facing forward in respect to her body.
In the Coherent UI demo we have a free flying camera so I locked the UI plane to always face the camera. This produced the very cool effect of feeling like a pilot of a fighter jet. The 3D effect that can be seen on some of the HUD elements becomes even more convincing in VR and adds a 'digital helmet' feeling.
Notice in the screenshot how small and concentrated the UI becomes - this is the position I personally felt most comfortable. It is unpleasant if you need to move your eyes inside the Oculus to look at a gauge or indicator that is too far from your focus point. The UI is semi-transparent so it doesn't get in the way with the exception of the big element in the upper right corner with the CU logo. It is too big.
First notice that the aspect of the HUD is different - in non-VR it is very wide and with the aspect of the screen. In the Rift however it needs to be replicated for every eye that by itself has a much more narrow aspect. This means that some elements that were very far apart will get closer and might even overlap.
UI elements close and in front of the player also means that they shouldn't get in the way of gameplay. I think that transparency mostly solves this because the HUD is still in the semi-peripheral region of the player's sight.
The resolution of the current generation of the Rift SDK is very low and makes reading text a real pain. The UI should be created with that in mind and numerical and textual information should be kept to a minimum and exchanged with more pictographic and color-coded elements.
In his TF 2 presentation Joe Ludwig argues that in VR the UI should be avoided but I think that it actually becomes even more interesting and compelling. The jet pilot helmet feeling I got after adding the HUD felt a lot more immersive to me than the 3D world alone.
I decided to also modify the sample menu scene with which the demo starts. The normal scene is just the logo of Coherent UI with some 3D animated buttons and a cool background. It is nice in 2D but looks somewhat dull in VR.
I did a very simple modification - just removed the background and placed the menu in an empty 3D world with just a skybox. This allows the player to look around even in the menu scene and the game responds to head movement immediately immersing in VR.
The most interesting plan I have is to try to simulate true 3D stereo elements in the HUD. Currently the gadgets are transformed in 3D in the space of the UI itself and then the resulting image is splatted on a plane in the game world. As Coherent UI supports all CSS3 transformations, it is possible to pass all relevant matrices to the UI itself to draw the elements as if they are correctly positioned in the 3D world and then just composite the whole image on the screen.
As far as the Rift goes, the biggest challenge in the context of UI is still the resolution. It is very difficult and tiring to read text. This however makes creating VR-aware UI even more interesting as new ways of expressing content must be found and employed.
UI in VR is a very new topic with many challenges still in the way and I will continue to share our experiments and ideas in the field.
The conclusions I reached are very similar to the ones the Valve team got in their work in porting Team Fortress 2 for the device. I'll also mention some ideas I will try in the future but hadn't enough time to complete.
UI in Virtual reality
In traditional applications the UI can be divided conceptually in two types - UI elements residing in the 3D world and elements that get directly composed on the screen and hence 'live' in the 2D plane of the display. Recently the distinction between these types of interfaces is diminishing - almost all modern game UIs have 3D or pseudo 3D elements in their HUDs and menus. In VR the difference vanishes as we'll see later in the post. |
| Some UI elements rendered with Coherent UI in a traditional non-vr application |
If you leave the same 2D overlay for the UI in VR you'll get something like this:

This result is obviously wrong, most of the elements won't be visible at all because they fall outside the field of view of the player. The central region of every eye in the Rift is where the player sees more clearly, everything else is periphery - the same applies to your eyes in the 'real' world.
If we composite the HUD before the distortion we'll get this:

Stereo UI
What I did is the same as the Valve team in TF 2 - drew the UI on a plane that always stays in front of the player. |
| The correct result |
In the Coherent UI demo we have a free flying camera so I locked the UI plane to always face the camera. This produced the very cool effect of feeling like a pilot of a fighter jet. The 3D effect that can be seen on some of the HUD elements becomes even more convincing in VR and adds a 'digital helmet' feeling.
Notice in the screenshot how small and concentrated the UI becomes - this is the position I personally felt most comfortable. It is unpleasant if you need to move your eyes inside the Oculus to look at a gauge or indicator that is too far from your focus point. The UI is semi-transparent so it doesn't get in the way with the exception of the big element in the upper right corner with the CU logo. It is too big.
UI design considerations for VR
This brings me to point that having a UI that is correct in VR is not enough - it must be tailored for it. What looks very good and usable in non-VR will most probably be very different in VR.First notice that the aspect of the HUD is different - in non-VR it is very wide and with the aspect of the screen. In the Rift however it needs to be replicated for every eye that by itself has a much more narrow aspect. This means that some elements that were very far apart will get closer and might even overlap.
UI elements close and in front of the player also means that they shouldn't get in the way of gameplay. I think that transparency mostly solves this because the HUD is still in the semi-peripheral region of the player's sight.
The resolution of the current generation of the Rift SDK is very low and makes reading text a real pain. The UI should be created with that in mind and numerical and textual information should be kept to a minimum and exchanged with more pictographic and color-coded elements.
In his TF 2 presentation Joe Ludwig argues that in VR the UI should be avoided but I think that it actually becomes even more interesting and compelling. The jet pilot helmet feeling I got after adding the HUD felt a lot more immersive to me than the 3D world alone.
I decided to also modify the sample menu scene with which the demo starts. The normal scene is just the logo of Coherent UI with some 3D animated buttons and a cool background. It is nice in 2D but looks somewhat dull in VR.
 |
| The old menu scene |
I did a very simple modification - just removed the background and placed the menu in an empty 3D world with just a skybox. This allows the player to look around even in the menu scene and the game responds to head movement immediately immersing in VR.
 |
| The new VR menu scene |
Future
There are some ideas that I plan to try out but didn't have the time while doing this integration.The most interesting plan I have is to try to simulate true 3D stereo elements in the HUD. Currently the gadgets are transformed in 3D in the space of the UI itself and then the resulting image is splatted on a plane in the game world. As Coherent UI supports all CSS3 transformations, it is possible to pass all relevant matrices to the UI itself to draw the elements as if they are correctly positioned in the 3D world and then just composite the whole image on the screen.
As far as the Rift goes, the biggest challenge in the context of UI is still the resolution. It is very difficult and tiring to read text. This however makes creating VR-aware UI even more interesting as new ways of expressing content must be found and employed.
UI in VR is a very new topic with many challenges still in the way and I will continue to share our experiments and ideas in the field.
Wednesday, June 12, 2013
Coherent UI Mobile comes for Unity3D
We have started Coherent Labs with the vision to bring to developers the best tools to build game user interface. For the past months we have been fully supporting desktop platforms and that allowed us to help some great projects like Planetary Annihilation. Coherent UI has also been integrated with the Unity3D engine and added to the Asset Store.
A lot of Unity3D developers have asked us for mobile support.
To help game creators put their games on as many platforms as possible we are introducing our new product - Coherent UI Mobile. And to add more value to developers already using Coherent UI for Unity3D we will add mobile support to the existing versions for free! So if you already own any version of Coherent UI you’ll just need to update to get mobile support.
We are aware that many developers create games for mobile platforms only, so Coherent UI Mobile will also be available as a standalone product for just $100. We have even included a special version of the desktop library, so developers will be able to preview their work in the Unity3D editor.
So check out the Asset Store on June 17 when we will open the beta with iOS support. Sign up now to get a notification and join the beta. For a limited time, we will be also offering 30% discount if you pre-order the final version of Coherent UI Mobile. A free evaluation version is available from our site.
We will be working hard on the Android version so expect it to be added to the beta very soon.


What can you do with Coherent UI Mobile?
Coherent UI Mobile comes with functionality similar to Coherent UI for desktop and it can be used for development of HUDs, menus and in-game browsers. Check our blog next week when we are planning to release our first tutorial explaining how to use Coherent UI Mobile to easily create amazing game UI.
We encourage you to sign up for the beta today and get a download link on the first day of the release.
Wednesday, June 5, 2013
Modern Game UI with the Oculus Rift - Part 1
In this series I would like to share with you the impressions I had while porting the Coherent UI demo graphics framework and demo interfaces for the Oculus Rift dev. kit. In the first part I'll cover the rendering integration of the Rift while in the following posts I'll talk about the strictly UI-related issues in virtual reality.
Much of the problems I'll cover have been tackled by Valve in their porting of Team Fortress 2 for the Rift as well as in their R&D team. Extremely valuable resources on the current state of VR that helped me a lot while doing the port are given below in the references section.

The task at hand was to add support for VR, implemented via the Oculus Rift.
I'll give a brief summary of what the process looked like for our framework. The Oculus SDK is very good at pointing what should be done and the process is not very complicated either. If the graphics pipeline of the engine is written with VR in mind it is actually trivial. Ours was not, so modifications were necessary.
The pipeline of the framework we use is based on a list of render phases that get executed every frame in order. We use the light pre-pass(LPP) technique and have several post-processing effects.
In order to support stereo rendering some phases must be done twice - once for the left eye and once for the right. Usually when drawing for the eyes we simply draw in the left and right helves of the RT for each eye respectively with different view and projection matrices.
The non-VR events look like this:
1) Set View & Projection matrices for the frame
2) Shadow maps building
3) Clear render targets
4) Fill GBuffer
5) Fill lights buffer (draw lights)
6) Resolve lighting (re-draw geometry)
7) Draw UI Views in the world
8) Motion blur
9) HDR to LDR (just some glow)
10) FXAA
11) Draw HUD
12) Present
Of those 4-7 must be done for each eye. LPP can be quite costly in terms of draw calls and vertex processing and even more so in the VR case. Our scenes are simple and hadn't any problems but that's something to be aware of.
I directly removed the motion blur because really makes me sick in VR and the Oculus documentation also points that motion blurs should be avoided. I also removed the HUD drawing as it is handled in another way than a full-screen quad as I'll explain in next posts.
The VR pipeline looks like:
1) Set central View & Projection matrices for the frame
2) Shadow maps building
3) Clear render targets
4) Set left eye View & Projection
4.1) Fill GBuffer
4.2) Fill lights buffer (draw lights)
4.3) Resolve lighting (re-draw geometry)
4.4) Draw UI Views in the world
4.5) Draw HUD
5) Set right eye View & Projection
5.1) Fill GBuffer
5.2) Fill lights buffer (draw lights)
5.3) Resolve lighting (re-draw geometry)
5.4) Draw UI Views in the world
5.5) Draw HUD
6) HDR to LDR
7) FXAA
8) VR Distortion
9) Present
Conceptually it is not that much different and complicated but especially post-effects have to be modified to work correctly.
As I said I draw the left & right eye in the same RT.
Post-process anti-aliasing algorithms might also suffer as they usually try to find edges as discontinuities in the image and will identify one where the left and right image meet. It is perfectly vertical however so no changes should be done.
The VR Distortion routine is the one that creates the interesting 'goggle' effect seen in screenshots and videos for the Rift. The lenses of the HMD introduce a large pincushion distortion that has to be compensated in software with a barrel distortion. The shader performing this is provided in the Oculus SDK and can be used verbatim. It also modifies the colors of the image slightly because when viewing images through lenses color get distorted by a phenomenon called "chromatic aberration" and the shader compensates for that too.
An important point that is mentioned in the Oculus documentation is that you should use a bigger render target to draw the image and have the shader distort it to the final size of the back-buffer (1280x800 on the current model of the Rift). If you use the same size, the image is correct but the fov is limited. This is extremely important. At least for me having the image synthesized from a same-size texture was very sick-inducing as I was seeing the 'end' of the image. The coefficient to scale the render target is provided by the StereoConfig::GetDistortionScale() method in the Rift library. In my implementation steps 4-8 are actually performed on the bigger RT.
The StereoConfig helper class is provided in the SDK an is very convenient. The SDK works with a right-handed coordinate system while we use a left-handed one - this requires attention when taking the orientation of the sensor (the head) from the device and if you use directly the projection and view adjustment matrices provided by the helper classes. I decided to just calculate them myself from the provided parameters - the required projection matrix is documented in the SDK and the view adjustment is trivial because it only involves moving each eye half the distance between the eyes left or right.
One small detail that kept me wondering for an hour is that if you plug the distortion parameters directly in the shader for both eyes (given by StereoConfig::GetDistortionConfig()) the image will not be symmetric with the outline of the right eye looking like the left one. For the right eye you have to negate the DistortionConfig::XCenterOffset. This is done in the Oculus demo but not very prominently and while there usually are parameter getters for both eyes, there is just one for the DistortionConfig which leads to think it might be the same for both eyes. If you analyze carefully the code in the shader you notice the discrepancy but the API successfully puzzled me for some time.
In the next posts I'll specifically talk about UI in the Rift.
Lessons learned porting Team Fortress 2 to Virtual Reality
John Carmack - Latency Mitigation Strategies
Oculus Dev. Center
Much of the problems I'll cover have been tackled by Valve in their porting of Team Fortress 2 for the Rift as well as in their R&D team. Extremely valuable resources on the current state of VR that helped me a lot while doing the port are given below in the references section.
The Rift
The Oculus Rift is a device that encompasses a head-mounted display and an array of sensors that track the orientation of the head. A good explanation on how to perform the integration and the details of the device can be found in the Rift SDK. It can be freely downloaded after a registration and I encourage anybody who is interested in VR to take a look at it even if you don't have a Rift device yet. The dev. kit is still a 'beta' version of the final product. The major issues I find currently is the somewhat low resolution of the display and that there is some yaw drift that really makes the developer life tough. Oculus are working on these and I'm positive that the final consumer product will be amazing. Other than that the experience playing and developing with the Rift is a great one and I'd encourage anyone who hasn't ordered his kit yet to hurry up and do it.
Porting the demo client (application)
Here at Coherent Labs we have a small 3D application we use for some of our demos. It is based on DirectX 11 and an in-house framework designed for rapid prototyping of rendering tasks. It is not a complete engine but has a fairly good rendering backbone and a complete integration with Coherent UI - a lot of the functionality is exposed to JavaScript and you can create Coherent UI views as well as animate and record the camera movement for demos through the script in the views themselves.The task at hand was to add support for VR, implemented via the Oculus Rift.
I'll give a brief summary of what the process looked like for our framework. The Oculus SDK is very good at pointing what should be done and the process is not very complicated either. If the graphics pipeline of the engine is written with VR in mind it is actually trivial. Ours was not, so modifications were necessary.
 |
| From this.. |
 | |
| .. to this |
The pipeline of the framework we use is based on a list of render phases that get executed every frame in order. We use the light pre-pass(LPP) technique and have several post-processing effects.
In order to support stereo rendering some phases must be done twice - once for the left eye and once for the right. Usually when drawing for the eyes we simply draw in the left and right helves of the RT for each eye respectively with different view and projection matrices.
The non-VR events look like this:
1) Set View & Projection matrices for the frame
2) Shadow maps building
3) Clear render targets
4) Fill GBuffer
5) Fill lights buffer (draw lights)
6) Resolve lighting (re-draw geometry)
7) Draw UI Views in the world
8) Motion blur
9) HDR to LDR (just some glow)
10) FXAA
11) Draw HUD
12) Present
Of those 4-7 must be done for each eye. LPP can be quite costly in terms of draw calls and vertex processing and even more so in the VR case. Our scenes are simple and hadn't any problems but that's something to be aware of.
I directly removed the motion blur because really makes me sick in VR and the Oculus documentation also points that motion blurs should be avoided. I also removed the HUD drawing as it is handled in another way than a full-screen quad as I'll explain in next posts.
The VR pipeline looks like:
1) Set central View & Projection matrices for the frame
2) Shadow maps building
3) Clear render targets
4) Set left eye View & Projection
4.1) Fill GBuffer
4.2) Fill lights buffer (draw lights)
4.3) Resolve lighting (re-draw geometry)
4.4) Draw UI Views in the world
4.5) Draw HUD
5) Set right eye View & Projection
5.1) Fill GBuffer
5.2) Fill lights buffer (draw lights)
5.3) Resolve lighting (re-draw geometry)
5.4) Draw UI Views in the world
5.5) Draw HUD
6) HDR to LDR
7) FXAA
8) VR Distortion
9) Present
Conceptually it is not that much different and complicated but especially post-effects have to be modified to work correctly.
As I said I draw the left & right eye in the same RT.
 |
| The render target before the distortion |
Render routines modifications
The shared render target has several implications regarding any post-processing routines. The HDR to LDR routine in our application does some glow effect by smearing bright spots in the frame in a low-res texture that gets re-composed on the main render target. This means that some smearing might cross the edge between the eyes and 'bleed' on the other one. Imagine a bright light on the right side of the left eye (near the middle of the image) - if no precautions are taken the halo of the light will cross in the right eye and appear on it's left side. This is noticeable and unpleasant looking like some kind of dust on the eye.Post-process anti-aliasing algorithms might also suffer as they usually try to find edges as discontinuities in the image and will identify one where the left and right image meet. It is perfectly vertical however so no changes should be done.
The VR Distortion routine is the one that creates the interesting 'goggle' effect seen in screenshots and videos for the Rift. The lenses of the HMD introduce a large pincushion distortion that has to be compensated in software with a barrel distortion. The shader performing this is provided in the Oculus SDK and can be used verbatim. It also modifies the colors of the image slightly because when viewing images through lenses color get distorted by a phenomenon called "chromatic aberration" and the shader compensates for that too.
An important point that is mentioned in the Oculus documentation is that you should use a bigger render target to draw the image and have the shader distort it to the final size of the back-buffer (1280x800 on the current model of the Rift). If you use the same size, the image is correct but the fov is limited. This is extremely important. At least for me having the image synthesized from a same-size texture was very sick-inducing as I was seeing the 'end' of the image. The coefficient to scale the render target is provided by the StereoConfig::GetDistortionScale() method in the Rift library. In my implementation steps 4-8 are actually performed on the bigger RT.
The StereoConfig helper class is provided in the SDK an is very convenient. The SDK works with a right-handed coordinate system while we use a left-handed one - this requires attention when taking the orientation of the sensor (the head) from the device and if you use directly the projection and view adjustment matrices provided by the helper classes. I decided to just calculate them myself from the provided parameters - the required projection matrix is documented in the SDK and the view adjustment is trivial because it only involves moving each eye half the distance between the eyes left or right.
One small detail that kept me wondering for an hour is that if you plug the distortion parameters directly in the shader for both eyes (given by StereoConfig::GetDistortionConfig()) the image will not be symmetric with the outline of the right eye looking like the left one. For the right eye you have to negate the DistortionConfig::XCenterOffset. This is done in the Oculus demo but not very prominently and while there usually are parameter getters for both eyes, there is just one for the DistortionConfig which leads to think it might be the same for both eyes. If you analyze carefully the code in the shader you notice the discrepancy but the API successfully puzzled me for some time.
In the next posts I'll specifically talk about UI in the Rift.
References
Michael Abrash's blogLessons learned porting Team Fortress 2 to Virtual Reality
John Carmack - Latency Mitigation Strategies
Oculus Dev. Center
Thursday, May 16, 2013
Coherent UI is now available on Unity3D Asset Store

We’re really happy to announce that Coherent UI for Unity3D is now available on the Asset Store. Buy Basic or Standard version or download a free trial from Coherent Lab’s website.
All versions of Coherent UI for Unity3D can be used for the creation and implementation of HUDs, menus, dialogs and in-game browsers. Our GUI library currently supports Windows (32 and 64 bit) and Mac OS X and soon we’re going to add Linux as well.
The Basic version covers all the primary needs of game UI developers allowing them to have both HUD and in-game browser at the same time. Standard gives more creative freedom because it allows unlimited number of views, SSL support, on-demand views and control view framerate, features needed for more complex projects.
We encourage Unity3D developers to take a look at our GUI library and to give us their feedback about it. All of your reviews and ratings will help us a lot with the future development of the product. We are always open to discuss ideas for new features and tools that will be of benefit for game UI developers.
For a quick start guide we suggest a look at our previous post Coherent UI in the Unity3D editor - Introduction. For more resources and tutorials follow the Unity3D tag on our blog or @CoherentLabs on Twitter.
Wednesday, May 8, 2013
Using TypeScript with Coherent UI
Previously we announced the automatic binding of .Net methods for Coherent UI. It greatly simplifies exposing the game to the UI, but also has some additional advantages that I want to share. Binding .Net methods allows to expose the game using concrete, separate interfaces. This allows for better structuring of the UI code - think of OOP and separation of concerns. It also allows for taking advantage of more advanced and modern web programming techniques, tools and languages like TypeScript.
TypeScript is a new language that compiles to pretty human read-able and efficient JavaScript while adding some desirable features:
You need to declare the Player class and the Item struct in order to take advantage of the static type checks.TypeScript is a new language that compiles to pretty human read-able and efficient JavaScript while adding some desirable features:
- optional static typing - catch errors while making them
- lots of EcmaScript 6 features - arrow functions, classes with inheritance, modules
- much better editor support - autocompletion and error highlighting in Visual Studio
The /// reference path="coherent.d.ts" includes the declaration of Coherent UI JavaScript API. This allows us to declare that the GetEquipment method returns a promise. Whenever you call the player.GetInventory() method in JavaScript, Coherent UI will call the player.GetInvetory() in the .Net universe and will resolve the promise with the returned list of items. You can download the declaration file of Coherent UI from here. So what is left to take advantage of TypeScript features - here is a screenshot of Visual Studio's Intellisense showing the documentation of the engine.on method:

In its next release TypeScript is going to have two major new features - generics and overloading on constants. They are going to make using Coherent UI with TypeScript even better and so expect more posts about using TypeScript with Coherent UI.
Thursday, April 25, 2013
Announcing our new release - Coherent UI 1.2.1
Coherent UI in Planet Annihilation
First we would like to show some pre-alpha footage of Planetary Annihilation the devs from Uber Entertainment have put online. The footage looks great and it is going to be a terrific game, we can't wait to see more and play it. Oh, and by the way, the user interface is powered by Coherent UI.
New release
We have recently released Coherent UI 1.2.1. It has two major new features - handling of downloads and exporting .Net objects with their methods to JavaScript. Also we have re-designed our internal task scheduling routines and gained up to 30% performance improvement. That helped us to improve the on-demand views, which are now much faster.
Downloads Handling API
Coherent UI supports a full in-game browser and now using the SDK developers can add download file functionality. When the user clicks on a downloadable file the API provides a notification and the developer can handle the download. API also allows developers to make direct file download request, with progress notification and multiple protocols support.
This opens a myriad of new possibilities like using Coherent UI for your game's launcher or updater - achieving both a visually stunning front-end and easy to code download/update functionality, without the need to handle the transfer yourself or to integrate other third-party libraries.
File download also enables developers to integrate seamlessly advanced social features like users sharing photos, videos or other content. Also game asset streaming - downloading resources in run-time becomes a piece of cake to implement. The potential usages of the feature are countless and the combo UI/browser/file downloads makes Coherent UI much more useful set of tools for many more tasks on top of user interface implementation.
.Net/Unity3D Method binding
Since its very first release Coherent UI already supported binding and executing of arbitrary .Net delegates by JavaScript. However it required explicit registration of each delegate via the View.BindCall and View.RegisterForEvent methods, which made it somewhat time-consuming and prone to typos. So we've added a new feature, that automatically exports .Net object with all of its methods to the browser JavaScript. This means you can call any .Net method on any object writing only a single line of code.
You just wrap the object and send it to JavaScript as an argument to an event or as a result of an engine.call handler and that's it - you can call every method of the object from JavaScript.
Here is how we use the Options instance in JavaScript:
Note that for every method of the .Net object that has return value, calling the JavaScript method returns a promise for this result.
This cool feature is available only for .Net and Unity3D for now, but we are going to add it to the C++ API too.
To give Coherent UI 1.2.1 a try download it from our website.
Tuesday, April 16, 2013
Objective-C++ ARC gotchas
Lately I had to mix C++ and Objective-C pretty heavily (it's called Objective-C++ apparently). What I usually need is having Obj-C objects inside C++ ones, which with "Automatic Reference Counting"(ARC) should work out-of-the-box. It actually does - except when it doesn't!
In essence what the compiler probably does is just add 'retain' & 'release' calls in the proper places (constructors, destructors etc.). It is smart enough to recognize pointers to ARC objects and treat them as non-POD.
This is actually very cool and simplifies the interaction a lot. Alas there are some problems when you try to do some more 'exotic' stuff.
A pretty standard C++ way to use your own memory management routines is to allocate some memory with your custom allocator and then use placement new to construct an object in the fresh memory. Destruction goes the other way around - call the destructor explicitly and deallocate your memory.
In the following code, as you might expect, 'dealloc' is called as soon as the C++ object is destroyed - so no leak happens:
However if you uncomment the 'virtual' keyword and hence make the hierarchy virtual the 'dealloc' method will not be called. The compiler in this case does not create the non-trivial destructor required! If you substitute the manual memory management with the delete operator then the destructor is synthesized and 'dealloc' gets called. The behavior is also prevented if your class is non-POD in C++ terms.
Not having a virtual destructor in a virtual hierarchy is arguably very bad, however breaking the ARC promise is even worse. I admit that stumbling upon this issue is not very easy because it requires a lot of things to happen but still the leaking references it introduces are serious enough to prompt me to write about it.
I haven't looked at clang's source about this issue and I can't find a rationale behind it in the docs so I think it's an oversight and can only speculate why it happens. The version of the compiler that I currently work and saw the problem is: "Apple clang version 4.1 (tags/Apple/clang-421.11.66)".
All that said, if you follow the basic C++ guidelines of having virtual destructors in your polymorphic hierarchies you should be fine when you try to mix C++ and Objective-C.
Thursday, March 28, 2013
Unity3D - compositing multiple Coherent UI Views (tutorial)
In this tutorial we'll show how to compose multiple Coherent UI views simultaneously on the main player camera.
Some example scenarios when you would like to achieve such an effect are:
1) Having both the HUD and a browser simultaneously active on the player screen - both camera-aligned
2) In a strategy game all the unit's portraits could be in one view (using the on-demand view feature for perfect gameplay synchronization) and all other HUD details (unit construction, menus, etc.) in another view
3) If you want to keep some sort of logic separate between views - for instance having the HUD and the menus in different views
These are only a handful of use cases, I'm sure many more can be invented. Keep in mind that most of the the time you could use just one view and separate the content with divs or iframes. For all the cases when this is not possible - here is a quick tutorial.
As it turns out achieving the composition is super easy in Unity3D and requires no code at all.
We'll use as a base the "MenuAndHud" sample available in the Coherent UI package.
In essence we'll render the two views on two render textures and then compose them on the Main camera via "GUI Textures".
1) Create an empty project
2) Import the Coherent UI package
3) Run Assets->Coherent UI->Install Coherent UI
4) Now navigate and open the scene we'll modify - Assets/CoherentUI/Samples/Scenes/Sample03_MenuAndHUD/Game/game.scene
5) First remove the Coherent UI View component that is currently on one of the faces of the cube

6) Remove the Coherent UI View component from the "Main Camera" (under "First Person Controller")
7) Add a Camera Game Object and set it's position to (0, 0, 100) or any other position where it won't be able to 'see' any of the scene or just use the culling mask of the camera

8) Add a Coherent UI View component to this new camera

9) IMPORTANT: Remove the 'GUI layer' component from the newly created camera.
10) Create a Render texture to hold our rendered view

11) Rename the texture to 'browser' and set it to 1024x512 pixels

12) Set the 'browser' texture as Render target for the new camera
13) Repeat steps 6-11 - create again a new camera, remove the GUI Layer component, create a new render texture but this time name it 'hudTex'. Set the Coherent UI View component on the second camera to be 1024x570 pixels and set it's 'Page' to 'coui://UIResources/MenuAndHUD/hud/hud.html'. Make sure the view has also "Is Transparent" and "Support Click Through" set to true.

14) Create a "GUI Texture" Game Object

15) Rename it to 'HudGui', set it's texture to our 'hudTex', it's position to (-512, -256) and it's size to 1024x570

16) Create another "GUI Texture" Game Object
17) Rename it to Browser, set it's texture to our 'browser', it's position to (-512, -256) and it's size to 1024x512. Note that the result will also be tinted by the GUI Texture 'Color' property. This could be used to achieve some neat effects.

18) Play!

That's it! With this technique you can compose as many views as you like anywhere on the screen. Try Coherent UI now!
Some example scenarios when you would like to achieve such an effect are:
1) Having both the HUD and a browser simultaneously active on the player screen - both camera-aligned
2) In a strategy game all the unit's portraits could be in one view (using the on-demand view feature for perfect gameplay synchronization) and all other HUD details (unit construction, menus, etc.) in another view
3) If you want to keep some sort of logic separate between views - for instance having the HUD and the menus in different views
These are only a handful of use cases, I'm sure many more can be invented. Keep in mind that most of the the time you could use just one view and separate the content with divs or iframes. For all the cases when this is not possible - here is a quick tutorial.
As it turns out achieving the composition is super easy in Unity3D and requires no code at all.
We'll use as a base the "MenuAndHud" sample available in the Coherent UI package.
In essence we'll render the two views on two render textures and then compose them on the Main camera via "GUI Textures".
1) Create an empty project
2) Import the Coherent UI package
3) Run Assets->Coherent UI->Install Coherent UI
4) Now navigate and open the scene we'll modify - Assets/CoherentUI/Samples/Scenes/Sample03_MenuAndHUD/Game/game.scene
5) First remove the Coherent UI View component that is currently on one of the faces of the cube

7) Add a Camera Game Object and set it's position to (0, 0, 100) or any other position where it won't be able to 'see' any of the scene or just use the culling mask of the camera


9) IMPORTANT: Remove the 'GUI layer' component from the newly created camera.
10) Create a Render texture to hold our rendered view


12) Set the 'browser' texture as Render target for the new camera
13) Repeat steps 6-11 - create again a new camera, remove the GUI Layer component, create a new render texture but this time name it 'hudTex'. Set the Coherent UI View component on the second camera to be 1024x570 pixels and set it's 'Page' to 'coui://UIResources/MenuAndHUD/hud/hud.html'. Make sure the view has also "Is Transparent" and "Support Click Through" set to true.

14) Create a "GUI Texture" Game Object

15) Rename it to 'HudGui', set it's texture to our 'hudTex', it's position to (-512, -256) and it's size to 1024x570

16) Create another "GUI Texture" Game Object
17) Rename it to Browser, set it's texture to our 'browser', it's position to (-512, -256) and it's size to 1024x512. Note that the result will also be tinted by the GUI Texture 'Color' property. This could be used to achieve some neat effects.

18) Play!

Monday, March 25, 2013
Unity 3D Facebook integration with Coherent UI (tutorial)
After our previous showcase of a minigame that opens a door, we're continuing the series on Unity3D with Coherent UI. This time we've chosen a more social scenario - you're playing a game, finally manage to kill the big bad boss that's been troubling you and now you want to brag to your friends! Let's see how you can do this easily using Coherent UI!
Here's a picture of the mech's ashes after I killed it:

Sidenote:
If you noticed the little avatar icon in the top left corner, that's the profile picture of the Facebook user I've logged in with. Before the player logs in, the Facebook logo is displayed instead. When she clicks the logo, the Facebook login page is displayed and she's prompted to grant the sample app permission to post on her behalf. This is what the game looks like before logging in:

After completing the login procedure, the image changes to the profile picture.

Fortunately, the mech GameObject already has a script that emits signals upon death, so the only thing we have to do is add another receiver and configure the action name. Since all the HTML content we need is displayed similar to a HUD, we'll add a CoherentUIView component to the Main Camera and that will be the receiver of the signal. The action name can be anything meaningful for you; I went for "OnEnemyMechDeath".
Note: you can see the last paragraph explained visually in the picture above.
We've got the death notification all sorted out, now we have to configure the receiver, i.e. the Main Camera GameObject. We've already added the CoherentUIView component and you can see its configuration on the next screenshot:

The Start method does two important things: first, it enables URL intercepting on the view and second, adds a handler that processes URL requests before they are completed. The handler itself (OnURLRequestHandler) checks the requested URL and if it starts with a bogus address that we defined as a placeholder ("http://www.coherent-labs.com/sample.html") it redirects the request to a local resource, passing all the parameters to the local URL. If you're not sure what's going on, here's a sketch of the flow:

That's all that the engine script has to do for the login. The other part is done by JavaScript, which will be discussed shortly.
Next, OnEnemyMechDeath. This method is executed when the mech dies and sends a signal, as we have previously seen. It triggers the JavaScript "ShowAchievementPopup" method and takes a screenshot of the kill site. The screenshot data is collected asynchronously as this article describes so the game doesn't hang for a bit. The sample still has noticable lag so you can apply more sophisticated methods for avoiding that. This data is then forwarded to the JavaScript "UploadImageOnFacebook" function.
There's nothing fancy about it, it just defines the achievement element and its animation and also subscribes for various events sent by the engine.
Note: You can examine the stylesheet file at this URL if you're interested.
The first thing that the script does is checking if the user is logged in Facebook. This is done by checking the anchor portion of the page URL - if there is none, we assume the user is not logged in (not the brightest, most secure way of determining that, but it does the job for the sample :)). If the user is not authenticated, a button element is appended to the HTML body that leads to the Facebook login dialog. Upon successful login, Facebook redirects the page to the same local resource that initiated the request (as we discussed previously in the login flow part). This time the window.location.hash.length property is greater than zero and the page assumes the user is logged in.
Changing the avatar icon is done by simply subscribing to the "auth.statusChange" event using the Facebook API:
Now that the user is logged in we can finally post messages and photos on the wall. Let's see what happens when we kill the mech! As we've already seen from the engine code part, the UploadImageOnFacebook JS function is called, supplying the image as a byte array and a message. That's half the parameters we need to upload an image; the other half are the user ID and the access token that allow us to form the correct URL and we have those from the FB initialization so we're good to go. An asyncronous request is sent and the result is logged.
If the AJAX request goes as planned, you should see your victory over machines documented :)

As always here's the video of the results:
Goal
Show an in-game notification when the player kills an enemy mech, take a screenshot of that glorious moment and upload it to Facebook.
Here's a picture of the mech's ashes after I killed it:

Achievement yay!
Sidenote:
If you noticed the little avatar icon in the top left corner, that's the profile picture of the Facebook user I've logged in with. Before the player logs in, the Facebook logo is displayed instead. When she clicks the logo, the Facebook login page is displayed and she's prompted to grant the sample app permission to post on her behalf. This is what the game looks like before logging in:
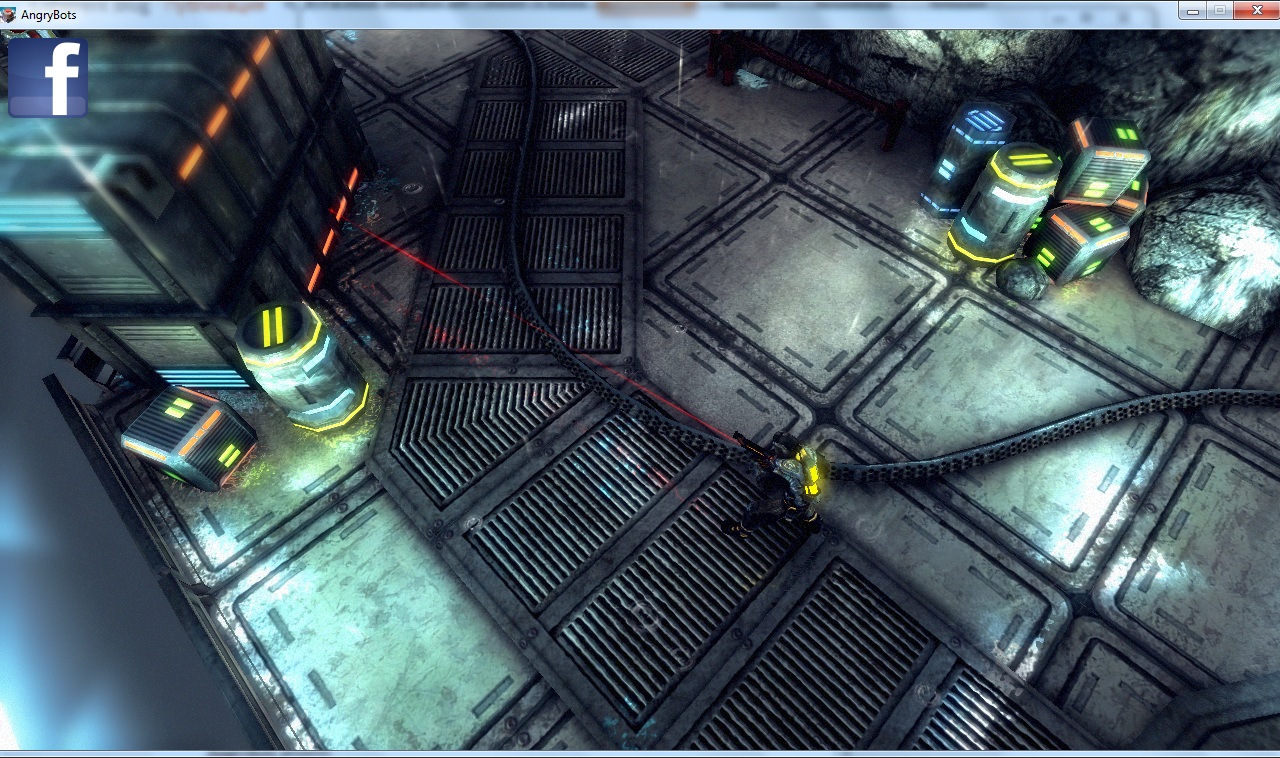
Avatar icon before logging in Facebook
After completing the login procedure, the image changes to the profile picture.
Prerequisites
- The AngryBots scene that comes with Unity3D
- Coherent UI for Unity3D (we'll also assume that you've already imported the package in the AngryBots project)
Scene setup
First, we'll have to find a mech that will act as our archnemesis and have it send a signal when it dies so we can activate the achievement logic. This is the one I chose:

The innocent mech that will soon find its doom
Fortunately, the mech GameObject already has a script that emits signals upon death, so the only thing we have to do is add another receiver and configure the action name. Since all the HTML content we need is displayed similar to a HUD, we'll add a CoherentUIView component to the Main Camera and that will be the receiver of the signal. The action name can be anything meaningful for you; I went for "OnEnemyMechDeath".
Note: you can see the last paragraph explained visually in the picture above.
We've got the death notification all sorted out, now we have to configure the receiver, i.e. the Main Camera GameObject. We've already added the CoherentUIView component and you can see its configuration on the next screenshot:

Configuration of the Coherent UI View component
Adding logic in the Main Camera GameObject
The component in the Main Camera GameObject that will be doing the hard work is the SignalReceiver. I'll first show you the whole code for the class and then briefly describe the methods.
The Start method does two important things: first, it enables URL intercepting on the view and second, adds a handler that processes URL requests before they are completed. The handler itself (OnURLRequestHandler) checks the requested URL and if it starts with a bogus address that we defined as a placeholder ("http://www.coherent-labs.com/sample.html") it redirects the request to a local resource, passing all the parameters to the local URL. If you're not sure what's going on, here's a sketch of the flow:

Login flow
That's all that the engine script has to do for the login. The other part is done by JavaScript, which will be discussed shortly.
Next, OnEnemyMechDeath. This method is executed when the mech dies and sends a signal, as we have previously seen. It triggers the JavaScript "ShowAchievementPopup" method and takes a screenshot of the kill site. The screenshot data is collected asynchronously as this article describes so the game doesn't hang for a bit. The sample still has noticable lag so you can apply more sophisticated methods for avoiding that. This data is then forwarded to the JavaScript "UploadImageOnFacebook" function.
The HTML/JavaScript side
We'll start with the HTML code for the page:
There's nothing fancy about it, it just defines the achievement element and its animation and also subscribes for various events sent by the engine.
Note: You can examine the stylesheet file at this URL if you're interested.
The facebook.js script
This script does most of the heavy lifting on the JavaScript side. It provides Facebook login functionality and functions for posting messages and photos on your wall. I'll review the initialization and uploading only, but you can check out the whole script here if you're interested.
The first thing that the script does is checking if the user is logged in Facebook. This is done by checking the anchor portion of the page URL - if there is none, we assume the user is not logged in (not the brightest, most secure way of determining that, but it does the job for the sample :)). If the user is not authenticated, a button element is appended to the HTML body that leads to the Facebook login dialog. Upon successful login, Facebook redirects the page to the same local resource that initiated the request (as we discussed previously in the login flow part). This time the window.location.hash.length property is greater than zero and the page assumes the user is logged in.
Changing the avatar icon is done by simply subscribing to the "auth.statusChange" event using the Facebook API:
Now that the user is logged in we can finally post messages and photos on the wall. Let's see what happens when we kill the mech! As we've already seen from the engine code part, the UploadImageOnFacebook JS function is called, supplying the image as a byte array and a message. That's half the parameters we need to upload an image; the other half are the user ID and the access token that allow us to form the correct URL and we have those from the FB initialization so we're good to go. An asyncronous request is sent and the result is logged.
If the AJAX request goes as planned, you should see your victory over machines documented :)

The screenshot posted by the Coherent Sample App
As always here's the video of the results:
Subscribe to:
Posts (Atom)